In this article, we will look at one of the features in the Gallery App of Samsung phones. This new feature is very useful and can be used to edit photos for you. This feature is just available a few weeks ago in the latest gallery app update on Samsung phones.
For those of you who want to try this feature, you can make sure first that you have updated the gallery application to the latest version.
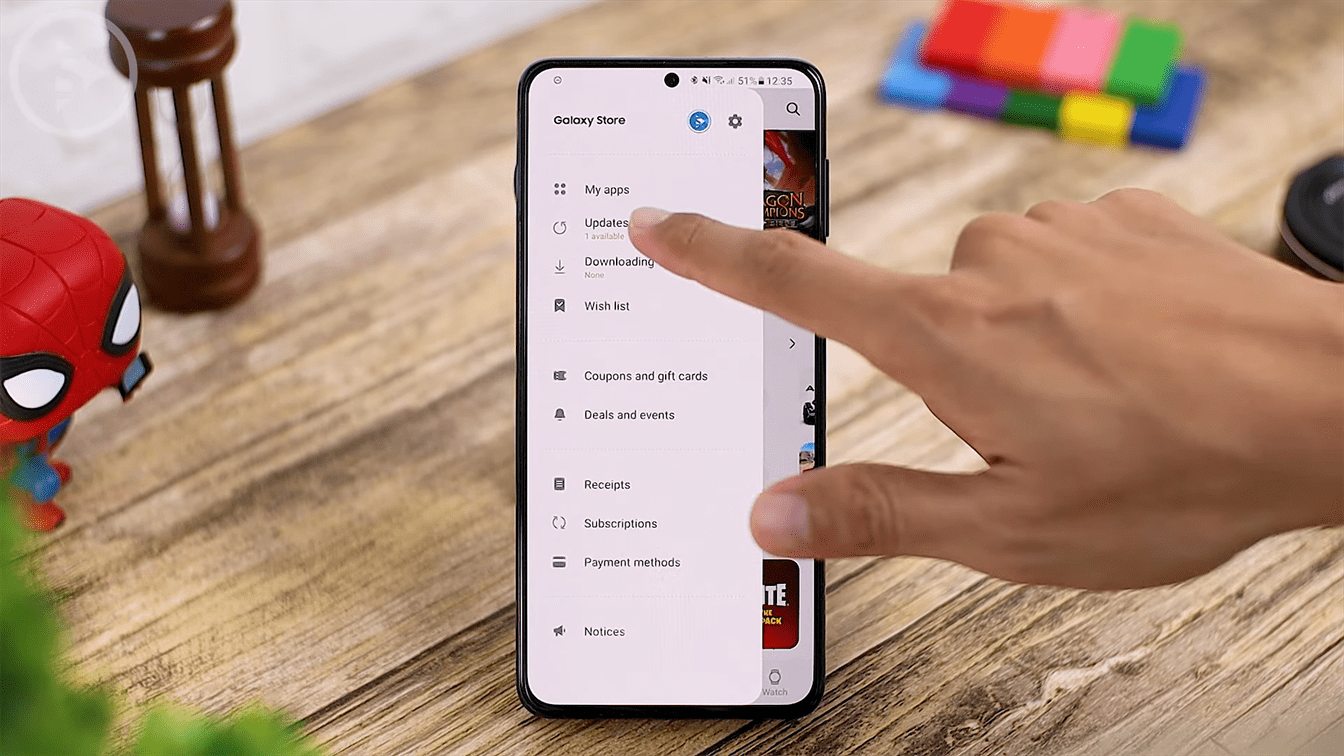
You can open the Galaxy Store application. Then click on the upper left corner option and select the updates option. and from here you just have to check whether you have updated the gallery application.

If you have updated the gallery application from the Galaxy Store, you can make sure by opening the gallery app. then click on the option at the bottom right corner. And select the settings menu, then click on “about gallery”.
In this “about gallery” make sure the version is already updated to the latest version. And if it’s already updated, you can immediately try this latest feature right away.

You can immediately use this feature to edit photos in the gallery automatically and fast. So, you don’t need to edit manually and the photos will be directly edited or “remastered” automatically.
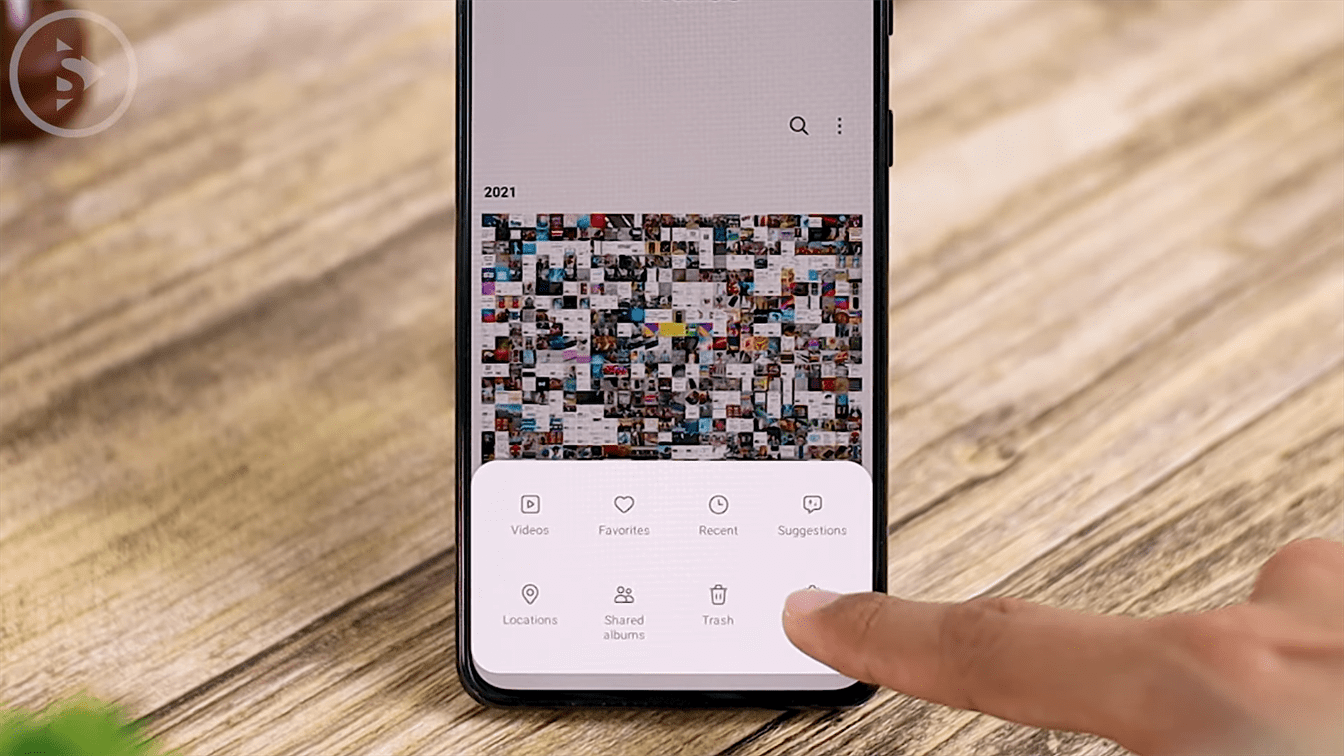
To see the features, you can open the gallery application then click on the option at the bottom right then here select the “suggestion” menu this “suggestion” feature will provide suggestions for the photos in your gallery.

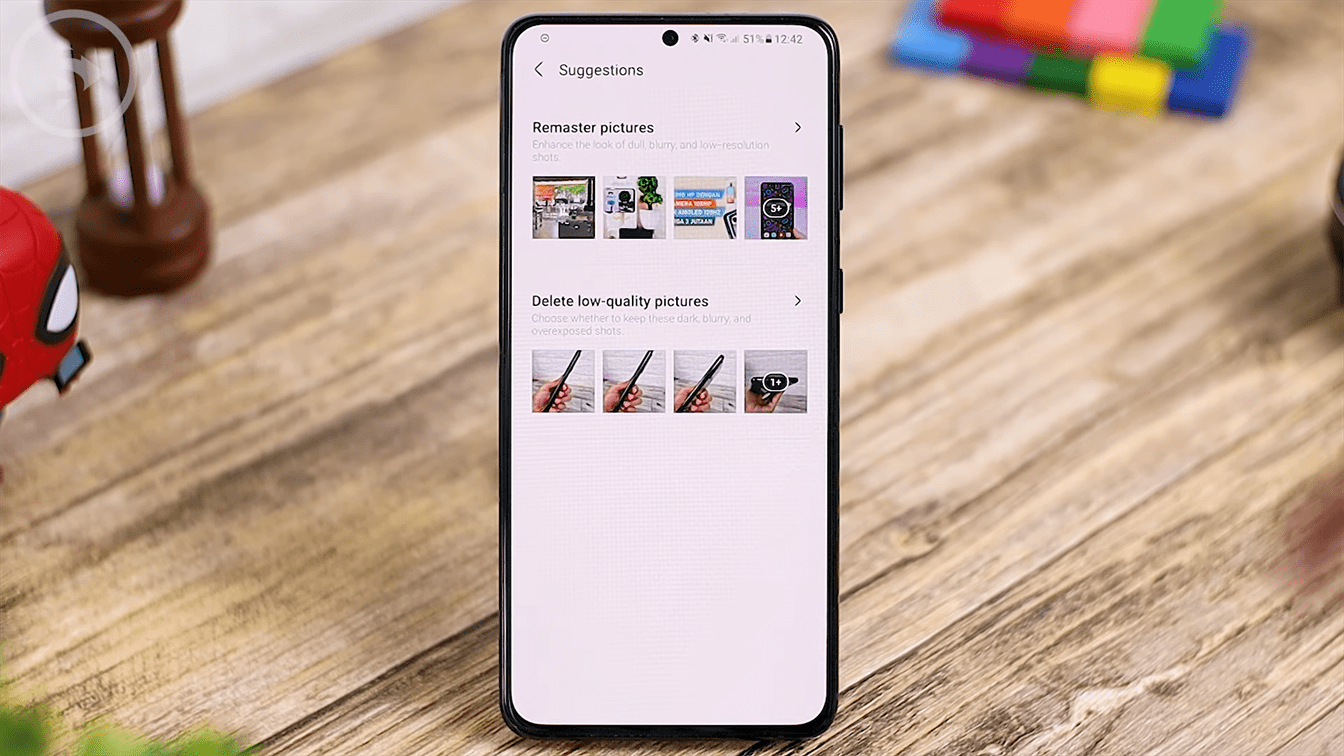
There are photos that are recommended to be “remastered” or edited automatically with AI and some are recommended to be deleted because of “low-quality” or blurred usually for blurry photos will go into this “delete low-quality pictures” category.

Then there is also a selection of photos that are recommended to be deleted because they are considered as document photos, usually here are screenshot photos. For the auto-delete feature of low-quality photos and for deleting documents that are usually screenshots, of course, the function is already quite clear.
If you want to delete it, you just have to go to this menu, then select the edit menu and you can choose whether the photo is suitable with what is suggested.

If you want to delete it you can directly “delete all” or if you don’t want any “suggestions” about this photo, because maybe the “suggestion” is not quite right. You can choose the “remove suggestion”. Here we will try to delete it, so let’s select the delete all. Then just click “move to trash”. Then photos that are recommended to be deleted because they are considered documents have been successfully deleted.
For the “delete low-quality pictures” menu are also the same. You just have to select edit and select the photos that you want to delete. Then you can “remove suggestion” if you don’t want to delete the photos, because the suggestion may not be right and you can also delete the recommended photos immediately.

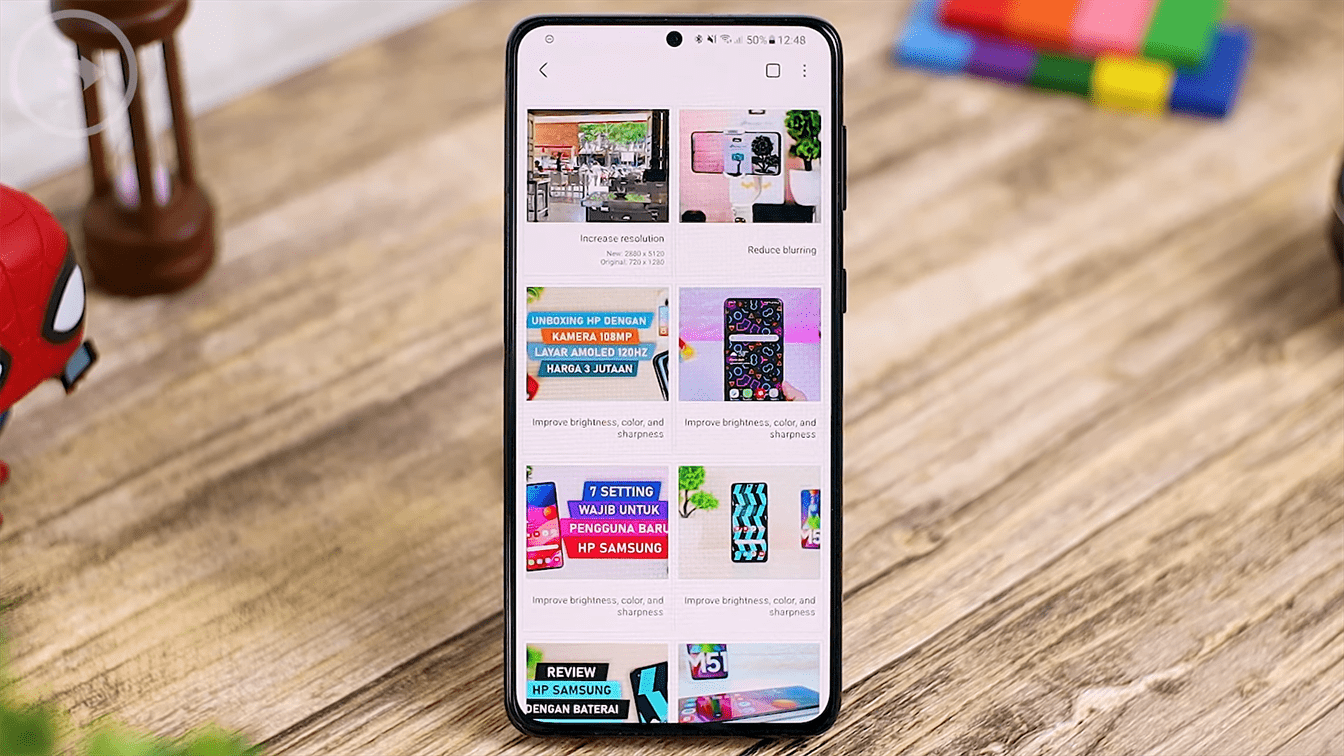
Then the most interesting thing about this “suggestion” feature is the latest feature called “remaster pictures”.
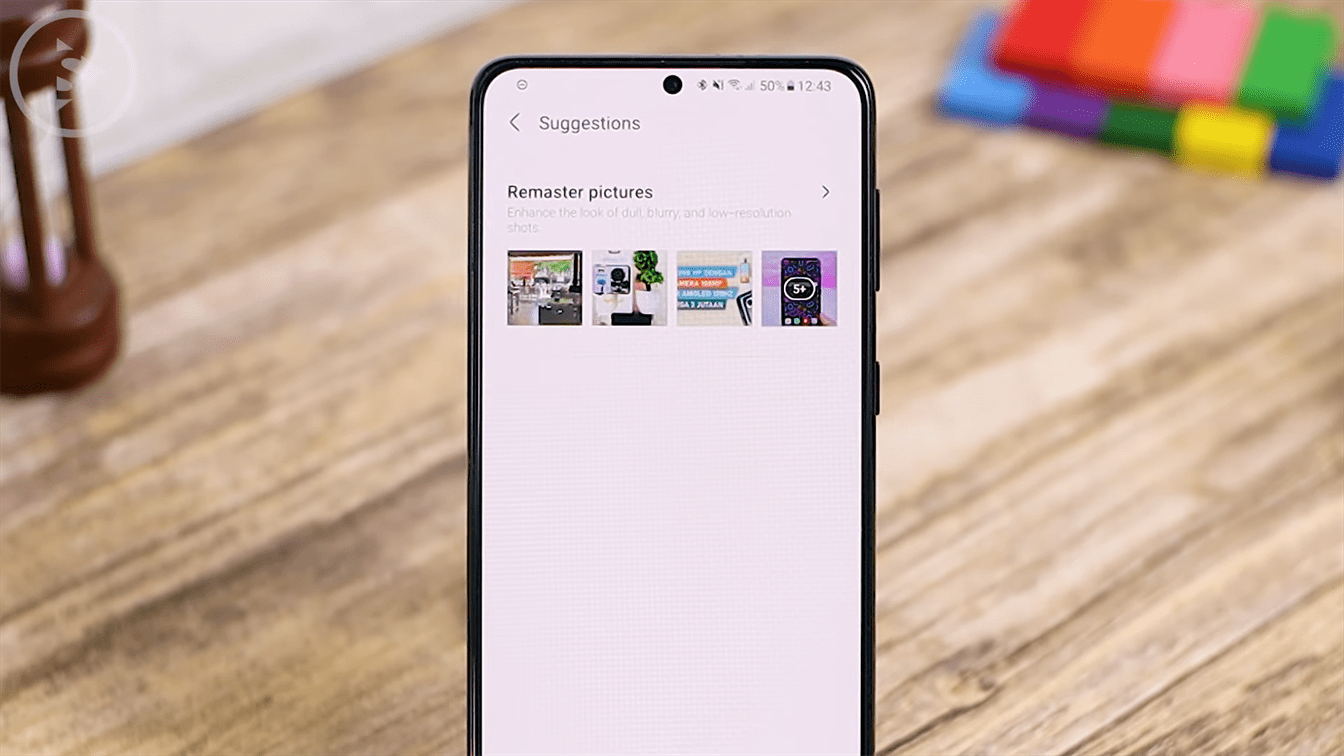
You can use this “remaster pictures” feature to edit photos automatically by using artificial intelligence technology. There are several things that can be automatically maximized with this “remaster pictures” feature, if you click on this feature, you can see that there are several photos that are automatically optimized.
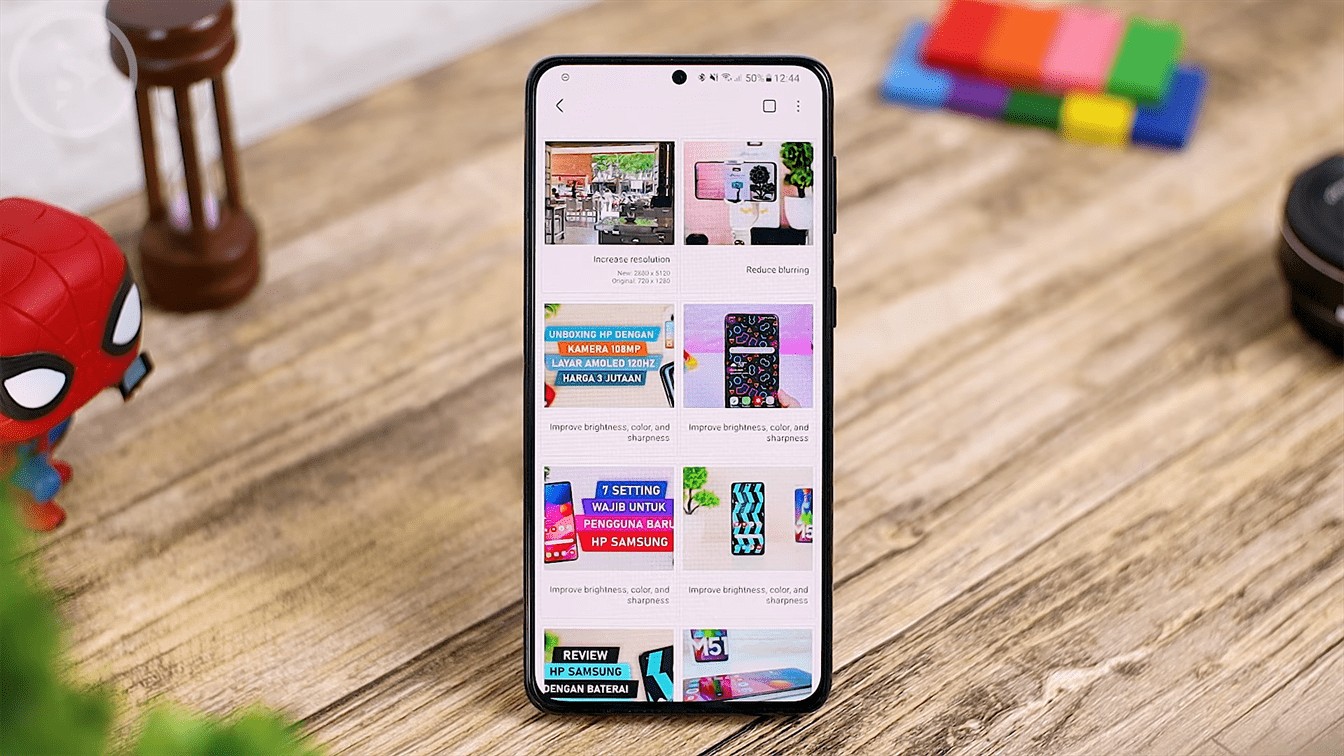
Here there will be a description on each photo about things that are being recommended to be improved from the photo here there is an “increase resolution”. It is recommended to increase the resolution from the original 720 x 1280 pixels Will be increased to 2880 x 5120 pixels.

Then in the second photo, there is also a “reduce blurring” which detects blur on the background of this photo. So, the AI suggests reducing the blur and then there is also an improvement in brightness, color and sharpness.

For example, this photo was being increased its brightness The colors are also improved and the sharpness is also improved so there are three things that are recommended for this photo if we use this remastered feature.
For this “improve brightness, color and sharpness” seems to be quite the “default” in various photos. For some other photos, there is also the same suggestion, improve brightness, color, and sharpness. And the last photo is also being recommended the same thing.

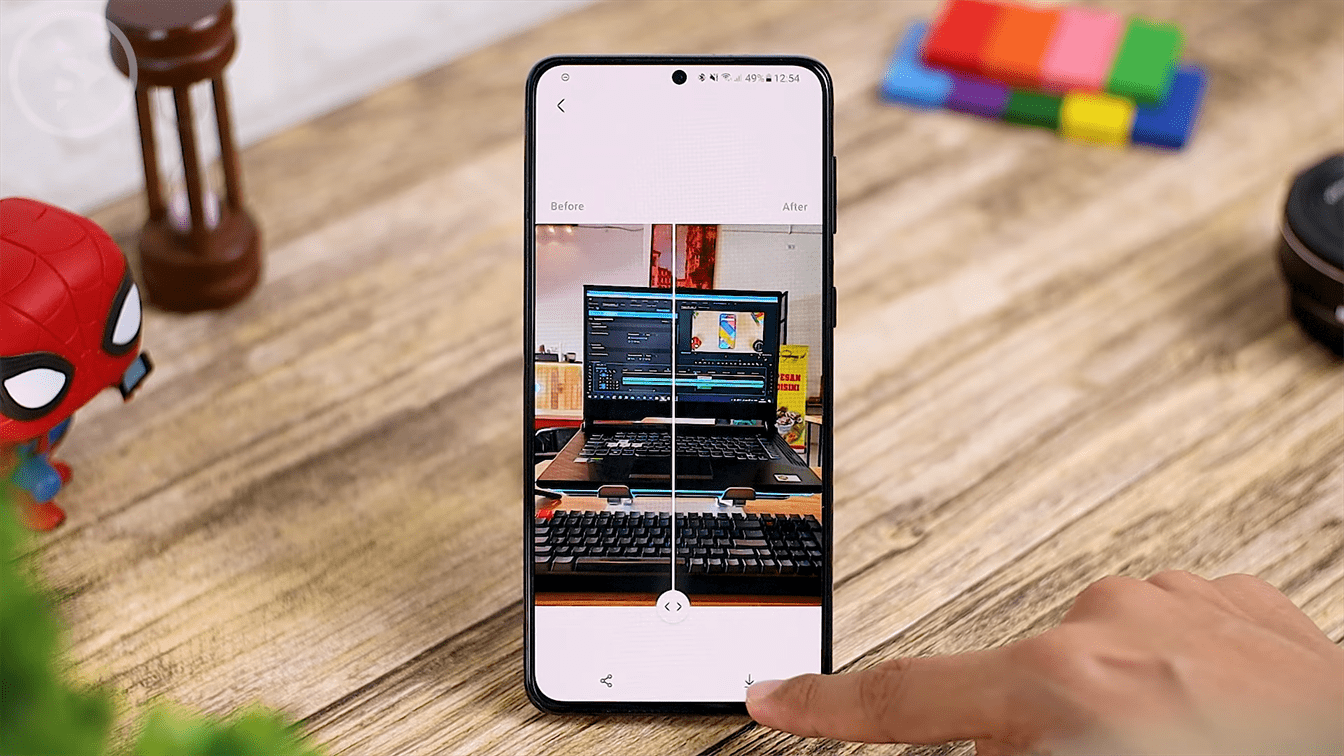
For each of these photos you can also check one by one inside each photo. you can check the photos from before being “remastered” and after being “remastered” on the right.
Here there is also a slider that you can use to see the difference, for the one on the left is the photo before “remastered” and the one on the right is after the photos being “remastered”. You can also check the other photos here. The one on the left is the “before” and the right is the “after”.

For those in the “suggestion” menu, these are the photos that were detected automatically that the quality can be improved with AI. And what is even more interesting is that this remaster feature not only can be used from this “suggestion”.
You can also directly “remastered” the photos in your gallery, whether you take photos directly from the smartphone or the one you took with another phone or from another camera.

So, all the photos inside the Gallery can be remastered automatically and later the AI will analyze and trying to detect the photo, what things can be “improved” from the photo.
For example, here you can see that there is a suggestion to “increase resolution”. There is some that recommended to reduce the “blur”. And some to increase its brightness, color, and sharpness.
So, the AI will detect the photo first, and only then will it be analyzed what things can be “improved” from the photo.
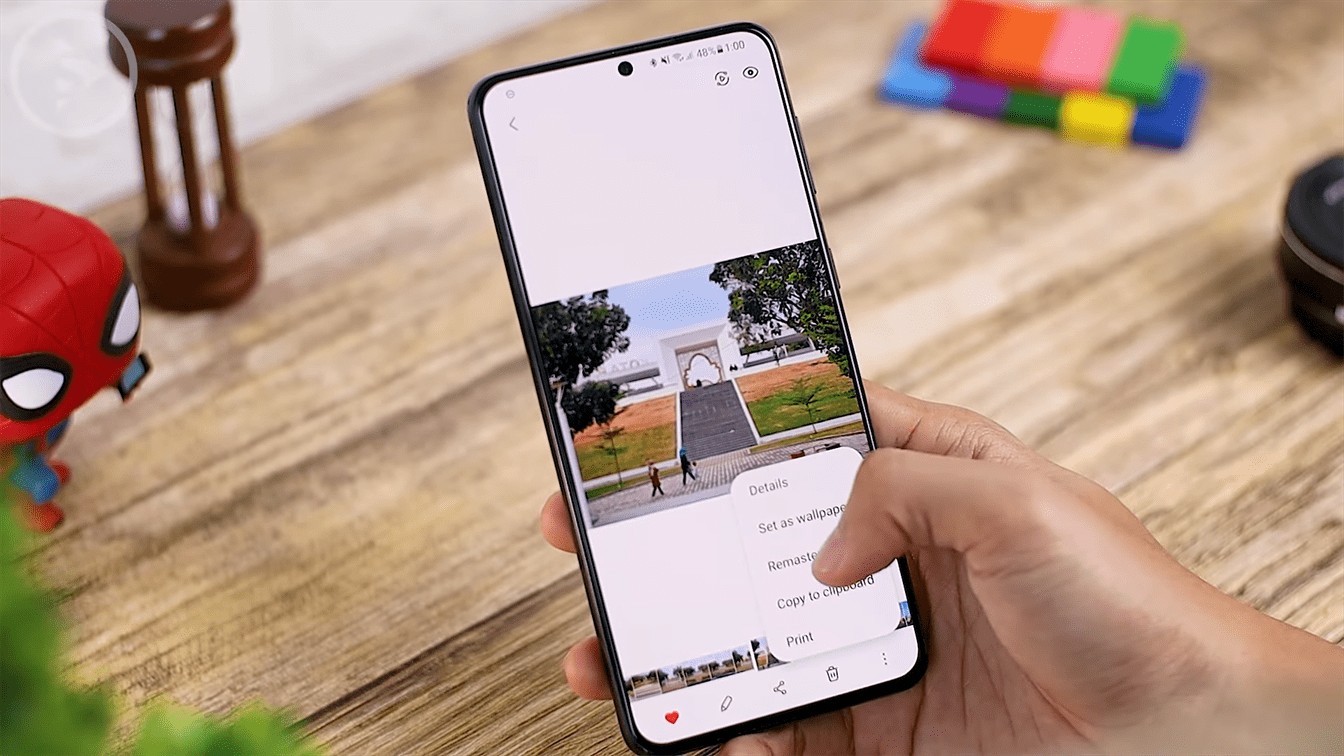
To try the “remaster” feature directly from the photos in your gallery, you can directly “go back” to the photos in the gallery, for example, this photo can immediately take advantage of the remaster feature by clicking the option at the bottom right. then select “remaster picture”.
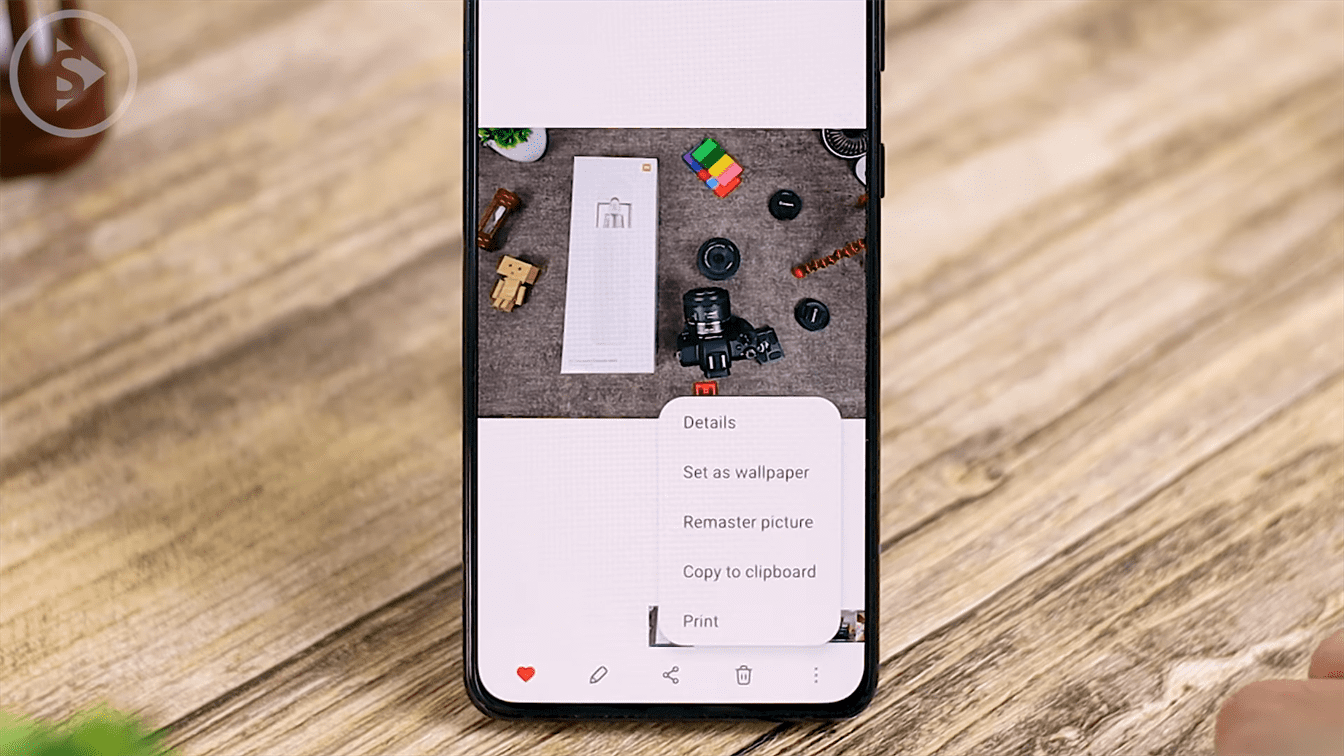
Then, the photo will be directly analyzed by AI to detect what things can be improved from the photo. And after being analyzed by AI, you can immediately see the “before” and “after” photos that are being “remastered” with this latest feature this is the “before” and you can also use the “slider” to see the “after”.

Then for each photo that you analyze with AI with this remaster feature. You can share it directly or you can save it in the gallery to share directly. You can press the share button on the left and to download you can directly save it to the gallery. So, photos that have been “remastered” will be directly stored in your smartphone gallery.

Then let’s try to “remaster” the second photo here, it’s quite clear the difference between “before” and “after” the photo is remastered automatically with this AI and here is the result, this is the before photo. And here you can also directly download the photo.
And here are some of the photos that we have remastered one by one with this latest feature.


So, you can immediately take advantage of this remaster feature to edit photos automatically and fast, and you can immediately “improve” various things automatically.
With this remaster feature, you can check the photos after being edited automatically, this will be quite more interesting and sharper than before being remastered.

So, you can take advantage of this feature to edit photos automatically and quickly, without the need to manually adjust the settings.
For the results, it’s quite good even though there are some missed in some of the analysis, but if you want to edit photos quickly without having to think about saturation, contrast, brightness, and so on manually. You can take advantage of this feature and you can instantly improve the quality of your photos quickly and automatically.
If you have any questions or comments, you can immediately write them in the comments section down below, or you can ask questions directly in our telegram group at the following link t.me/santerta. or ask directly on our Instagram DM at @santertainment.
You can also check the video version here: