In this article, we will see the latest features in updated One UI 3.1 on the S21+. Here, to make the difference more visible in the latest update of One UI 3.1, we will compare it with the previous version of One UI 3.0 on the S20+ on the left. In the latest update of One UI 3.1 on S21+, there are various new features that are quite interesting to try. These features are still not present in One UI 3.0 version used in the S20+ series. However, later after getting the One UI 3.1 update, of course the features will be available for other series as well. Okay, now let’s see what are the newest features in One UI 3.1.
1. Call Background
The first feature is in the background app, on the Phone Dial. In the Phone Dial setting in 3.1 there is a new feature in the Call Background section. In the Call Background section of One UI 3.1 there are some default backgrounds added here. For One UI 3.0, there is only one background. In the updated One UI 3.1, you can immediately choose the default background with more choices than before. For the previous option, there was only one color gradation like this, while One UI 3.1 has three additional options with interesting animations.

This is the first animation added in One UI 3.1 and there is also a second animation added with an animation design like this. Then the last one is an emoji option like this one. For this AR emoji, you can also set an emoji that you design yourself. You just have to set it in the AR emoji application. Then, at the bottom there is also the option Use video sound as ringtone. So, if the video already has sound, you can immediately use it as a ringtone when a call comes in.
2. AR Emoji
Then, for the second different feature in One UI 3.1, this is in the emoji section in the AR emoji. Here, you can set AR emojis in the AR Zone application in the latest One UI 3.1. In the AR Zone section, we choose the AR Emoji Sticker that has been made. You can make it from a selfie photo or from an existing photo in the gallery. For example, let’s make it from an existing photo in the gallery. For the One UI 3.0 version, you cannot create it from photos in the gallery. Here we try to make it from one of the photos in the gallery. Let’s just try with this photo as an example. For the latest version, we can directly select a photo from the gallery and emojis will be made from the photo that has been taken. And now the emojis are finished. We click All done at the bottom. Here it appears the emojis that have been made, there are different choices for this One UI 3.1. For One UI 3.0, there are the same 4 choices, but the icons look different in this update.

In the AR Zone application in the AR emojis, after you make the emojis, the emojis will appear a little different. For the previous version the menu options will look like this and in the latest version the menu display will be like this. You can directly Add to Gallery for this option which is the same as the previous version, it’s just that the icon is a little different. However, for the second one, the Add to Always on display and Set as profile picture is different from the previous version. For the previous version, we can only Share and Delete. Then, here we can only edit the emojis for display, while in the One UI 3.1 version there is an option to name Always on display and also set the picture profile. You can immediately set it for your profile picture and if you can, it’s Always on display, whereas in the previous version you could only edit the emojis like this. Here you can see the AR emoji setting, you can enter it directly into the Always on display setting.
3. Blue Light Filter

The third feature difference in One UI 3.1 is the Blue light filter. In the settings section, if we open it in One UI 3.1, we see in the Display section there is a slight naming change in One UI 3.1. For setting the Blue light filter in One UI 3.0, previously it has changed its name to Eye comfort shield in the One UI 3.1 version. And when we enter the Blue light filter or Eye comfort shield setting, now there is an Adaptive feature. In the previous version of One UI 3.0, there were only two settings, namely Turn on now and Turn on as scheduled, while for the latest setting, the choice is Adaptive. For the previous version in One UI 3.0, the option is Sunset to sunrise, now it is moved to this Adaptive setting. As for Custom, now the menu itself is separate at the bottom and in the latest version of One UI 3.1 there is also a Color temperature setting. So, apart from moving some settings, there are also additional new features in the One UI 3.1 update this time.
4. Continue Apps on Other Devices

Then, the fourth feature is in the Advanced features section for Continue apps on other devices. You can find the feature in the settings, then select Advanced features. Then, here is a new feature called Continue apps on other devices in the One UI 3.1 update. We can use this feature for several supported applications such as Samsung Internet and Samsung Note. So, you can immediately use this supported application on some of your Samsung Galaxy devices. So, this is one of the newest features that you can use to switch apps more seamlessly. Hopefully in the future there will also be support for other applications.
5. Video Call Effects
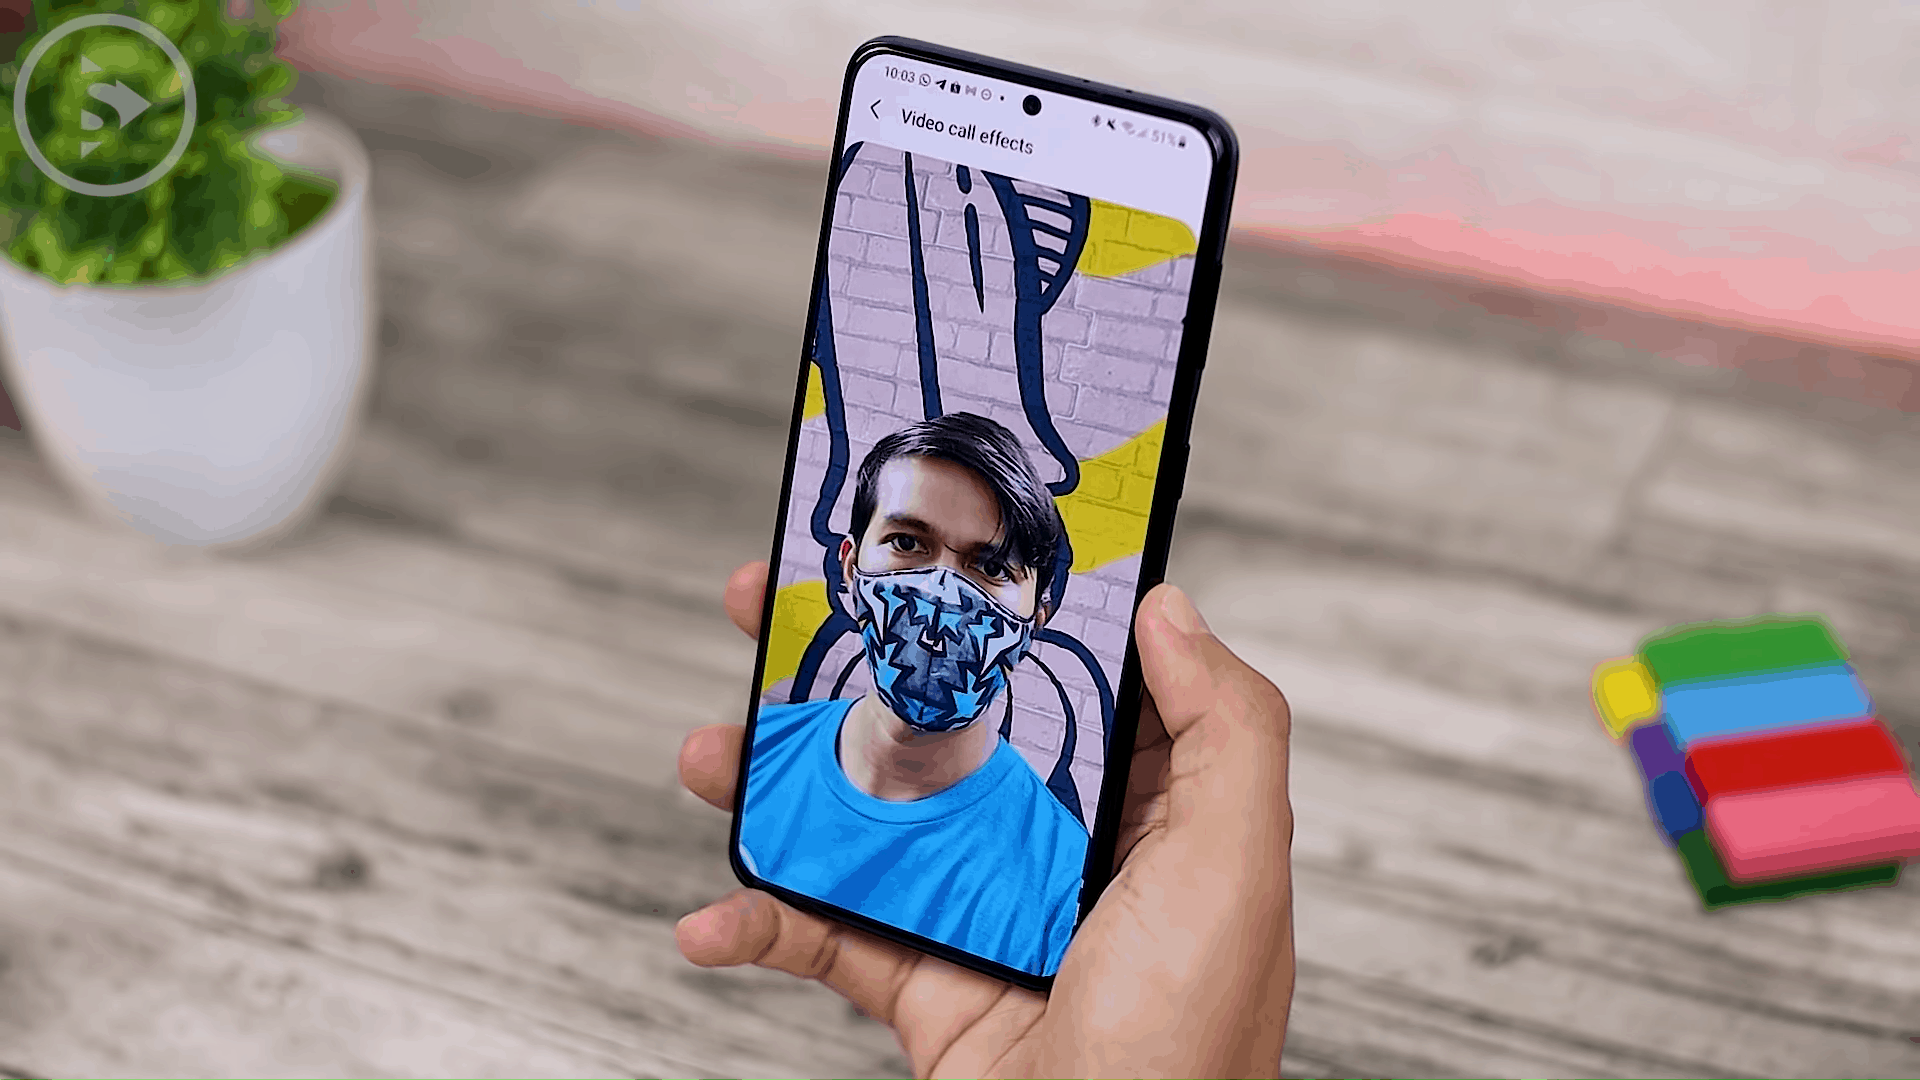
Then, the fifth is still in the Advanced features section. At the bottom there is a new feature called Video call effects. This video call effects have not been in the previous One UI 3.0 version. In the Video call effects settings, you can choose Blur effects, Color effects, and also select photos in the image settings. You can select the gallery then select a photo for the background. So, you can use the video call effects feature for those of you who are using the Zoom application or the Google Duo application. There is a blur option for the background blur effect on the back, then you can also change the color and then there is also an option to change the photo to your like. For this third option, for photos you can select directly from your smartphone gallery. You just have to choose the background you like for the video call display. So, this is like a feature in the Zoom application for a laptop or pc. You can change the background directly from the smartphone without the need to use other additional applications.
6. Remove Location Data
Then, the next feature is in the smartphone gallery section. For example, we take a photo from a smartphone and we check the photo details, usually in the photo details section , by default there will be an address or location when the photo is taken and when we share the photo to another smartphone, for the One UI version 3.0 we will also share the location. For those of you who want to share photos but don’t want to share the location where the photos are taken, now in One UI 3.1 there is a Remove location data feature. So, in the One UI 3.1 update this time when you tap on Remove location data, the photos you send will not include their location data.
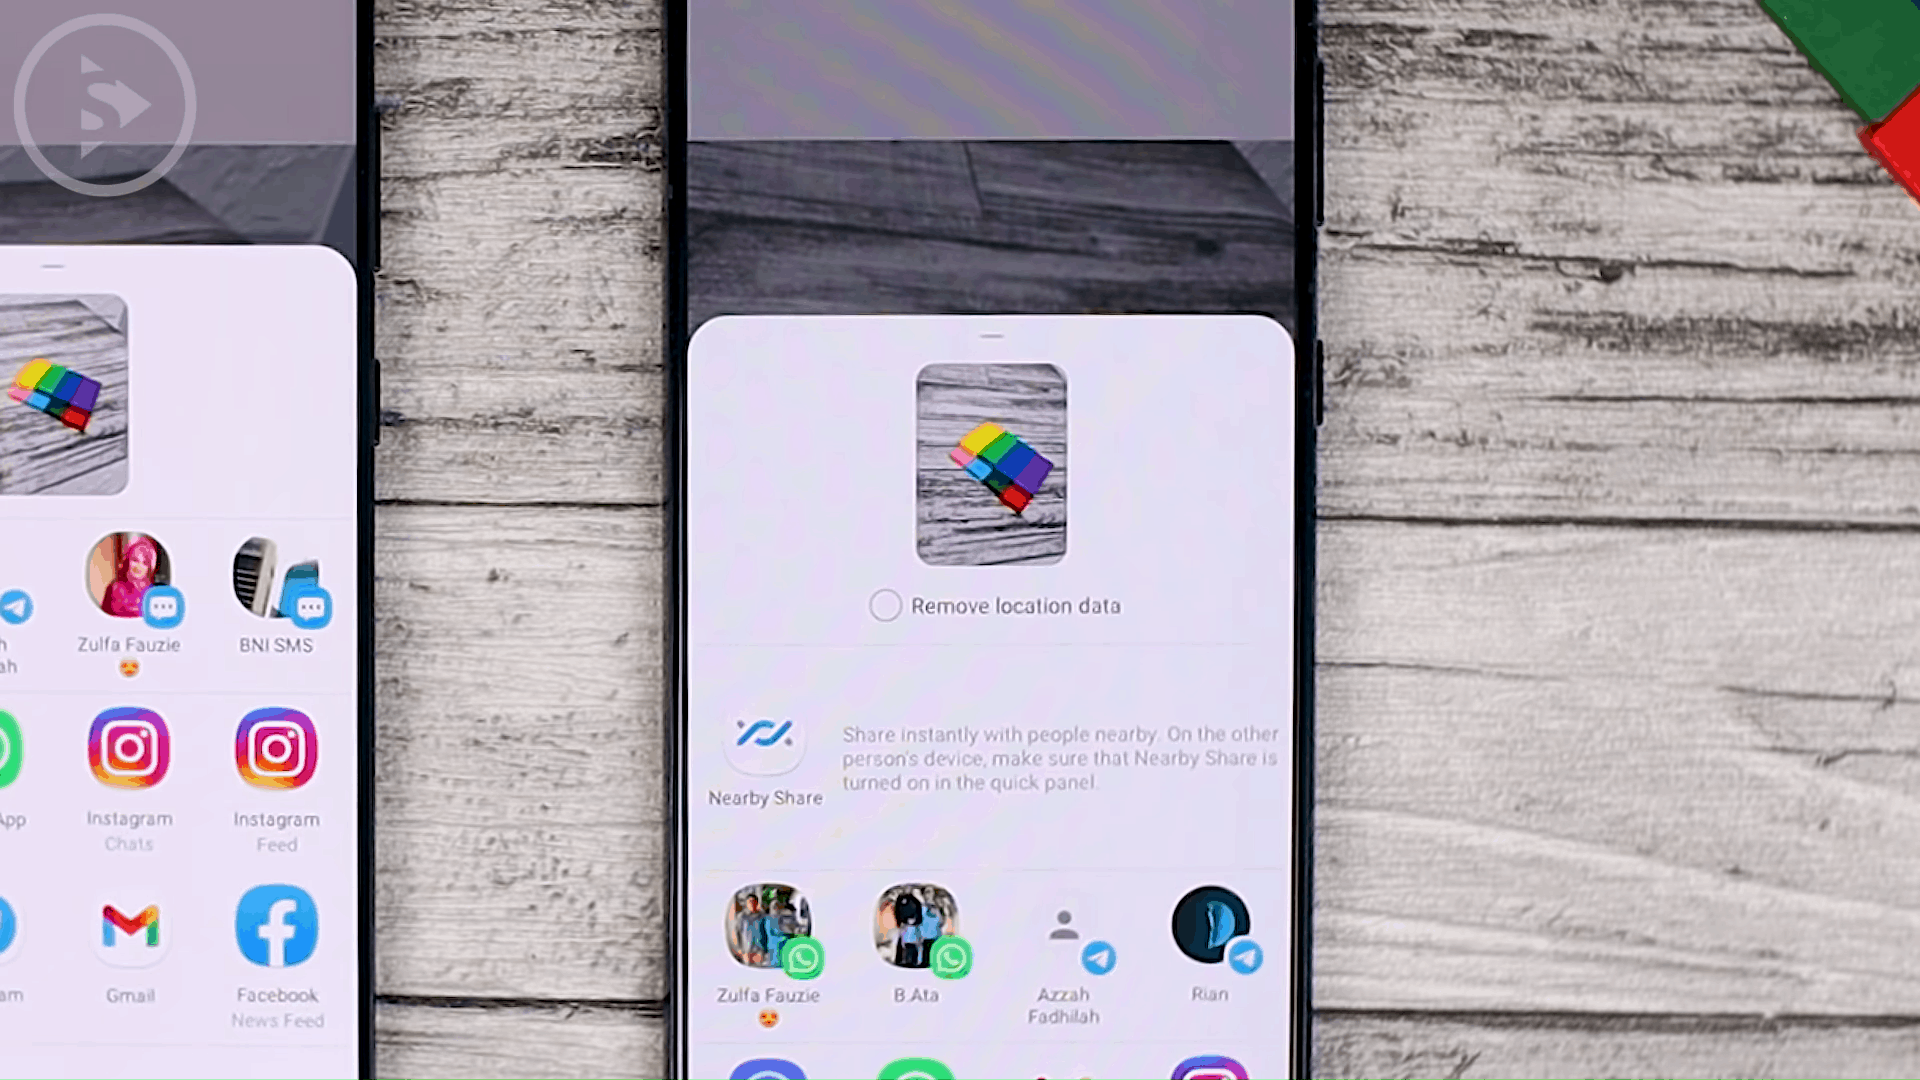
For example, here we are trying to send photos from S21+ to S20+ with Quick Share feature and we tick the earlier Remove location data feature. And when you send photos to other smartphones like this from S21+ we send to S20+, this is the same photo we send from S21+ to S20+. And for S21+, the location of the photo captured data is still listed here. And for the photos we sent earlier, after we tick Remove all location data, when we check the details later the display for this location will not be sent. So for those of you who still want to display the location data in the photos that you take on your smartphone, but don’t want to send this location to another smartphone, you can check the Remove location data feature, so later the location data when tho photo is taken will not sent to another smartphone.
7. Set Bedtime

Then the next new feature is in the Clock application section. For the Clock application, the One UI 3.1 update has the latest features added in the application. If the previous version of One UI 3.0 only had Delete, Settings, and Contact us, now there is a Set bedtime in this One UI 3.1 version. For Set bedtime, you can enter this setting and select Next and here you can immediately select a schedule for your sleeping hours. In this latest feature, you can immediately set your sleep schedule in the settings. Here we select Next, then here we can Adjust your bedtime settings. Then, here there is a notification Reminder option and also Bedtime mode. If you activate Bedtime mode, the screen will be black and white later, and for all calls that come in at bedtime you will be immediately muted. For notification sounds, it will also be immediately silent if you activate Bedtime mode. Later the clock will be immediately adjusted to the clock you choose according to your sleeping time.
If you have any questions or comments, you can immediately write them in the comments section down below, or you can ask questions directly in our telegram group at the following link t.me/santerta. or ask directly on our Instagram DM at @santertainment.
You can also check the video version here:

