In this article, we will see 7 cool features on Samsung smartphone camera on the latest update of One UI 4.1. Previously, the updated version of One UI 4.1 was only available in S22 series. However, now this latest version of One UI 4 is also already available on several other Samsung series, The previous Samsung S21 series also have received this One UI 4.1 update.
Okay, now let’s just take a look at 7 cool features on Samsung smartphone camera after One UI 4.1 update.
1. Save Director’s View Videos Separately

For the first feature in the latest One UI 4.1 update, is on the camera application, inside “Director’s view” mode. When opening the camera app, then go to “Director’s view”, in the latest One UI 4.1 update now you can separate the output of the recorded video from the “Director’s view”.
Previously, the videos recorded on “Director’s view” feature, will be saved in the same video file. And in this latest update, you can separate these two different videos, into two different video files that you can edit later on.

So, if you press the menu at the top center inside “Director’s view” mode, you can activate a feature that can save these two videos separately. you can see the differences, when recording video directly without activating this latest feature in “Director’s view” mode.
For the video output from the front camera and rear camera, will be merged into one video format. and you can no longer edit, the position and size of these two videos after the video has been recorded. So later when you see the recorded video inside the smartphone gallery, the video output will become one video file, and you can’t edit them separately.
And if you activate this latest features by pressing the center icon at the top, then record the video in “Director’s view” mode, you can edit the video separately later on. So, for the video size for both front camera and rear camera, later you can adjust it according to the size you want.
If you activate this latest mode before recording the video, there will be an indicator written on the top right corner, for the “Director’s view” mode and the camera used. And then you can also find the difference when you edit the video. When you press the edit button, the new Dual Video and Single Video options will appear.
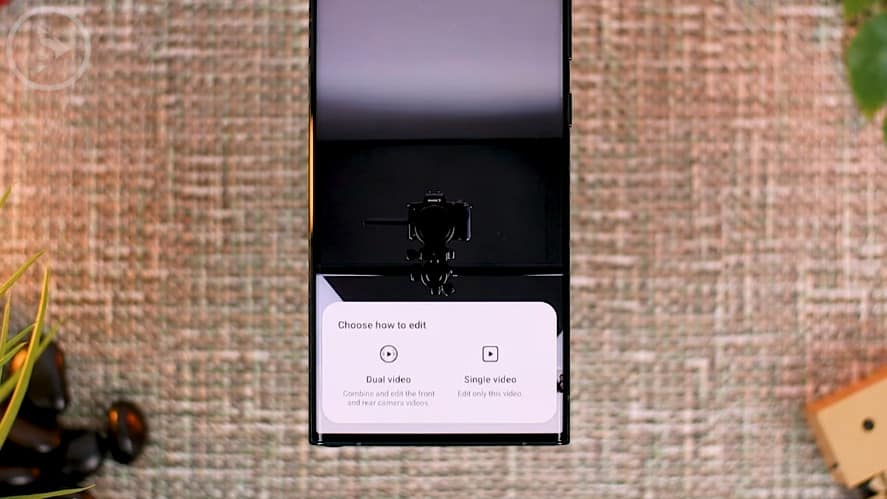
If you want to edit a video from the front camera only, you can choose the Single Video. And if you choose Dual Video, the video editor application will automatically select the video from the front and rear camera, that you record directly from “Director’s view”.
Here, for example, let’s choose Dual Video, then here after you have recorded both videos from “Director’s view”, you can still edit the frame position of the video. So you can be more freely in editing these two videos that you have recorded from “Director’s view”.

For example, if you want to make a video with this format, you just need to adjust the position. Then you can directly save this to a new video file. So if you have several video formats that you want to produce from “Director’s view” mode, you can take advantage of this latest features from One UI 4.1 update. and by recording a video with the rear and front camera in “Director’s view”, later you can get a variety of different formats, that you can edit even after recording the video.
2. Portrait Effects on Gallery
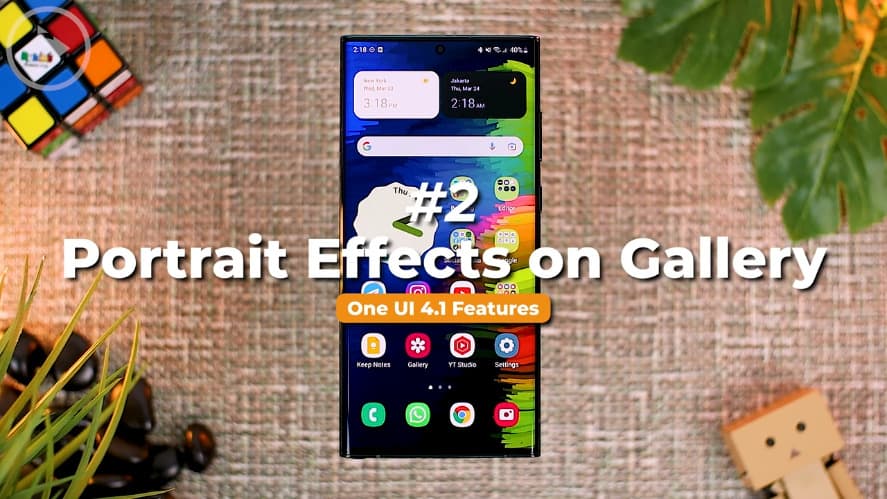
Then the second new feature in the latest One UI 4.1 update is now you can add portrait photo effects, even for the photo that you have taken on standard camera mode. So if you forget to activate portrait mode when taking a photo, in the latest update now you can still improve the edits so that it will have a portrait effect.
For example, you can see that there are several photos that we take with the front-camera here. For the photos taken on portrait mode, there will be an option called “Change background effect”. And if you take the photo in portrait mode, you can still change the effect as you like, even after taking the photo.
And in the latest update of One UI 4.1, even if you don’t use portrait mode when taking a photo, you can still activate this portrait effect on your photos.
For example, in this photo, which we took on standard camera mode without activating portrait mode, and after the photo was taken, now in the latest update of One UI 4.1, we can still activate the portrait effect on this photo, even though you don’t take the photo from portrait mode, and only with standard camera mode.
To activate it you can click three dots option at the bottom right corner, then select “Add portrait effect”. And now the photos will be automatically added with the portrait mode. So now in the latest update of One UI 4.1, you still have the possibility to add a portrait effect to the photos you’ve taken on standard camera mode and the effect is also pretty clean and almost look the same as the usual portrait effect.

However for this new “Add portrait effect” feature, you can only add a “blur” effect on the background. And this feature can’t change to other background effect like on portrait mode.
3. Lighting Position Editing

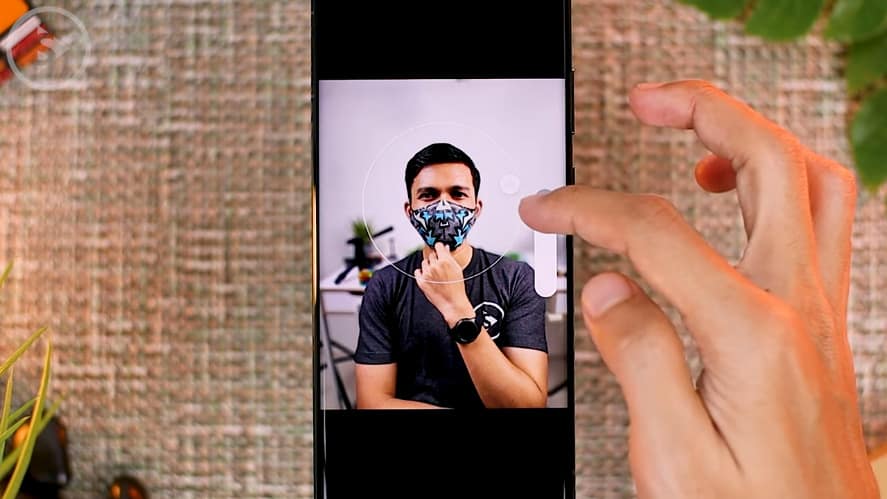
Then the third new feature is Lighting Position Editing. this feature is also still related with the portrait effect. For Lighting Position Editing, this means that now you can change the lighting position, in the photos that you have taken in portrait mode. For example, in this photo taken in portrait mode, here let’s change the “background effect”.
In the latest One UI 4.1 update, now you can change the lighting position on the object of the photo. You can try this new feature in this studio effect, then click on the right option to adjust the lighting.
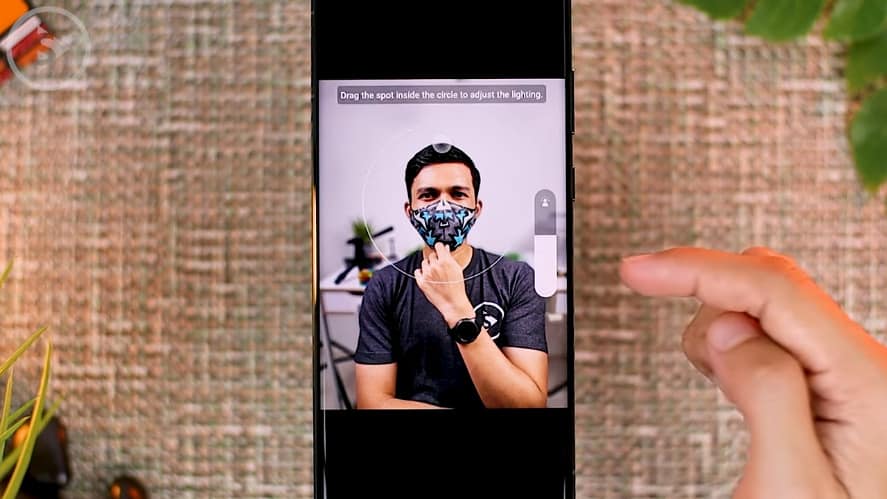
In the previous version of One UI 4.0, you could only adjust the brightness intensity of the object. and now, In the latest One UI 4.1 update, you can change the lighting position, by changing the indicator position inside this circle.
You can see the difference right here, for example, if we try the highest lighting option, then change the lighting position
to the left, you can see on the left side the lighting is brighter than on the right side, and if we move the lighting to the right side, the right side will look brighter.
So it looks as if the light here is more dominant than on the left side. So this is one of the most interesting features, because you can change the lighting effects on the object of the photo. And you can easily adjust it, with the effect that you want on the photo.
You can also make the lighting comes from the top, or you can also make the lighting position in the middle to give a balance light to the whole face. You can easily adjust the lighting position in this latest portrait feature in One UI 4.1. And when you’re done, you can directly apply the effect on the top right corner.
4. Auto Convert Motion Photos
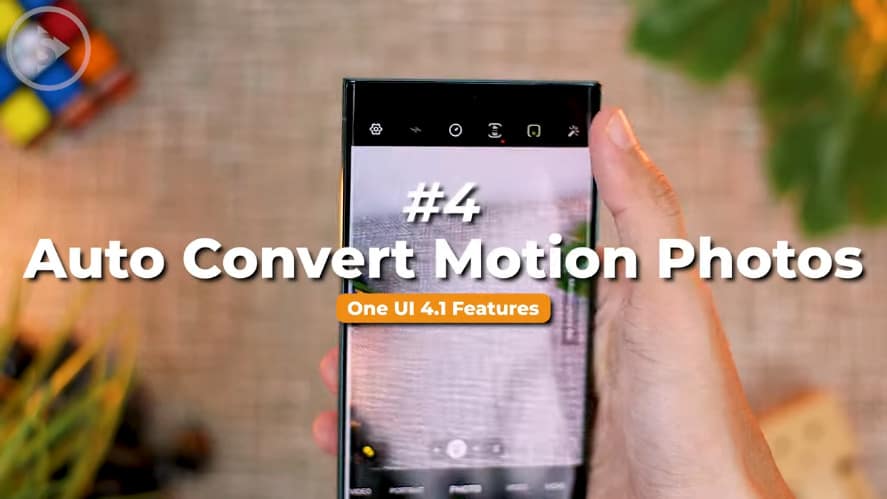
Then the next new feature is in the “Motion Photos” option. For those of you who don’t know what is Motion Photos, it is a feature that will record a few seconds of the movement before taking a photo.
So when you take a photo in the camera application, then here activate the Motion Photos mode on the top right. You will find the photo taken on the gallery comes with “View motion photo” option. And you can see the movement about two or three seconds before the photo was taken.

This feature is actually quite useful for viewing the moments before the photo was taken, but it will be less needed when you activate Motion Photos only to scan documents.
So in the latest One UI 4.1 update in the gallery application, sometimes in the Suggestions menu, Motion Photos will appear which are recommended to be deleted. For example, for the Motion Photos that you take when scanning documents. There will be suggestions to change Motion Photos to standard photos in this Suggestions menu.
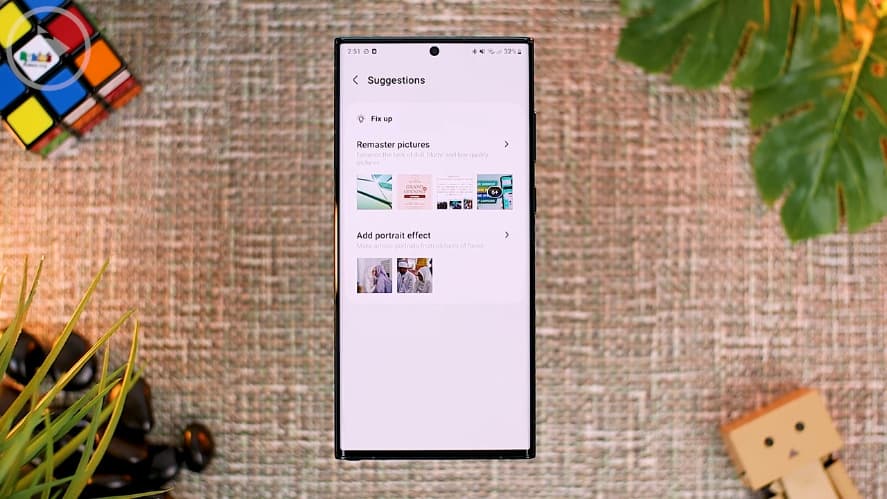
You can find the menu directly from the gallery app, then click on the three-strip option below. Then click on the Suggestions menu. If there are Motion Photos that you have in your smartphone gallery, and the chances are you don’t really need them as Motion Photos.
Later, there will be suggestions to convert the Motion Photos to be “still images” or standard photos. and if there are any new suggestion, it will appear in this Suggestions menu.
5. Improved Photo Remaster
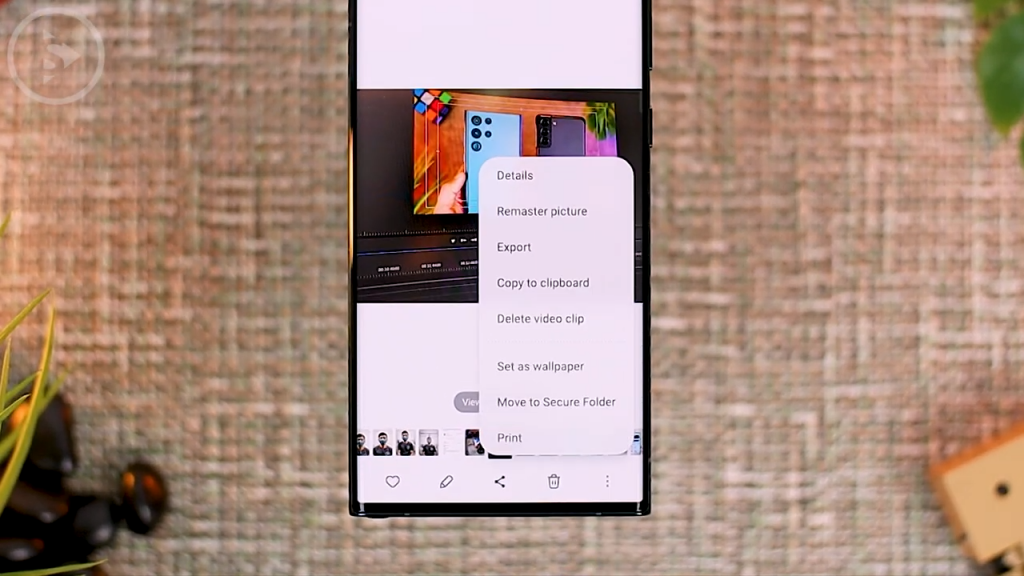
Then the fifth new feature is Photo Remaster which is more improved than the previous version. The Photo Remaster feature already exists from the previous version. And you can immediately find the options by clicking on three dots option on the bottom right in the Gallery app. Then select “Remaster picture”. And the photos will be immediately analyzed and remastered to be better.
This is a photo that we take directly from the laptop screen, and usually when we take a photo from the monitor there will be a glare like this. And with the Remastering picture in the latest update of One UI 4.1, you can see the glare on this smartphone has been smoothed out and even looks completely gone.
So there are some improvement in the Remaster Picture, in the latest One UI 4.1 update which doesn’t available in the previous version.
6. Expert RAW Support
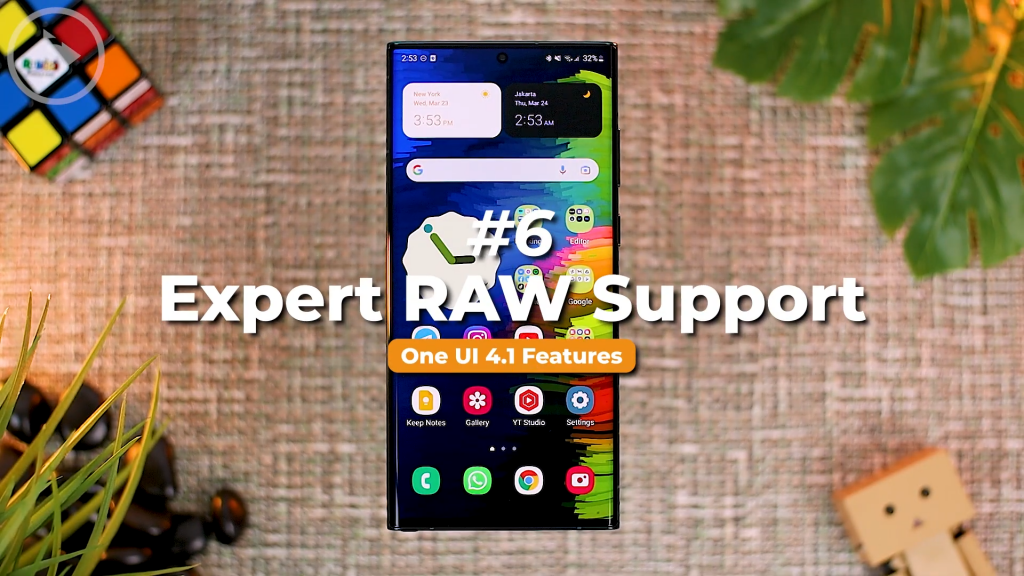
Then the sixth new feature in One UI 4.1 is the Expert RAW feature. The Expert RAW feature is not supported in all Samsung series, even in S22 series, it only supports on S22 Ultra. Later this Expert RAW feature will also be supported in other Ultra series, such as in S21 Ultra series and also in Foldable series like Z Fold 3 and Z Fold 2. For Note 20 Ultra and S20 Ultra series, you will also get this Expert RAW feature in One UI 4.1 update.
For those of you who want to take photos in RAW format that can be edited more optimally in Adobe Lightroom, you can download Expert RAW from Galaxy Store. And all you have to do is search for Expert RAW on Galaxy Store. Then you can directly download the application.

And if your smartphone has been updated to One UI 4.1 and already supports this feature, you can immediately open the application and take photos with Expert RAW mode. For photos that you take with Expert RAW mode, you will be able to edit them more freely in Adobe Lightroom.
And for the file size is also larger than the standard photo. For example, in this photo, when we take a photo with a standard camera, it will only take up 7.49 MB of memory with a resolution of 3000×4000 pixels. And photos with Expert RAW that were in the same lighting, and the same conditions, the photos will take up 44.42 MB of memory with a resolution of 3000×4000 pixels.
You will find the difference when you edit the photo inside Adobe Lightroom. For the depth of color in the photos you take with Expert RAW mode, you can explore more color options when you edit the photos on Adobe Lightroom later on.
7. Shadow & Reflection Eraser
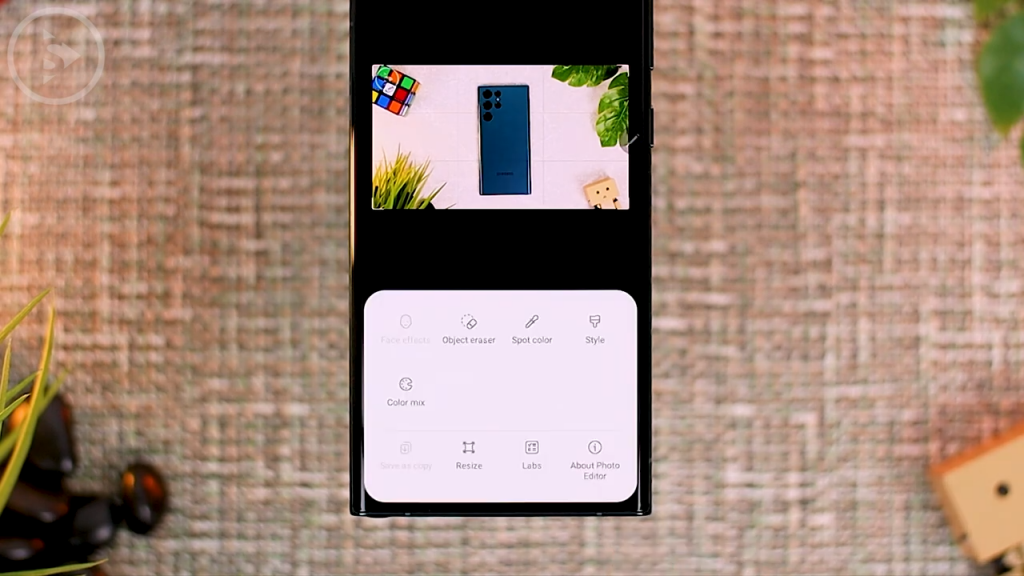
Then the seventh new feature is Shadow & Reflection Eraser. You can find this feature directly on the Photo Editor mode. To open Photo Editor mode, you can directly open one of the photos in your smartphone gallery. Then you just click the pencil icon to go to the Photo Editor mode.
And in this Photo Editor mode, you can directly click on the three dots option at the bottom right, then select Object Eraser. with this Object Eraser feature, previously you can only remove an object from the photos. You can just select the object you want to delete, then click the Erase button. And the object will be immediately erased from the photo automatically. You can also select other objects in the photo, and the selected objects will be erased from the photo as well.
And in this One UI 4.1 update, besides erasing objects, you can also erase shadows and reflections in the photo. For example of the photos that can be used for this “Erase shadow and reflection”, we have tried several other photos that have worked in the previous video.
See you on the next article.